
In this post, I will show you how to install and get started with Terraform as a network engineer. Terraform is an infrastructure-as-code software tool. This means you are able to define your desired configuration as text in a file and enforce that state. Terraform is less of a scripting language and more of a “describing” language. HashiCorp, the company behind Terraform has named it HCL (HashiCorp Configuration Language).
Terraform is less useful to a traditional network engineer who is configuring routers and switches but more useful to a cloud based network engineer, or someone who is deploying VPCs in AWS or vnets in Azure. Terraform has also been found to be useful in configuring load balancers and firewalls.
In this post we will get Terraform installed and running and well look at how to use it to configure Cisco ACI. I will be using a virtual instance of ACI Simulator which will allow us to do basic things like add switches, create tenants, bridge domains, EPGs, but we will not be able to do things like change the underlay fabric settings due to limitations in ACI Simulator.
For now, I’ll assume you’re using Windows 10 for your workstation. I’ll also be using VS Code as it seems that is what most people are using for an IDE these days. If not, there are 100s of other guides out there to get Terraform installed for your specific platform of choice.
Install VS Code. Download page. Pretty straight forward installation process. I agree, next, next, next, next, restart.
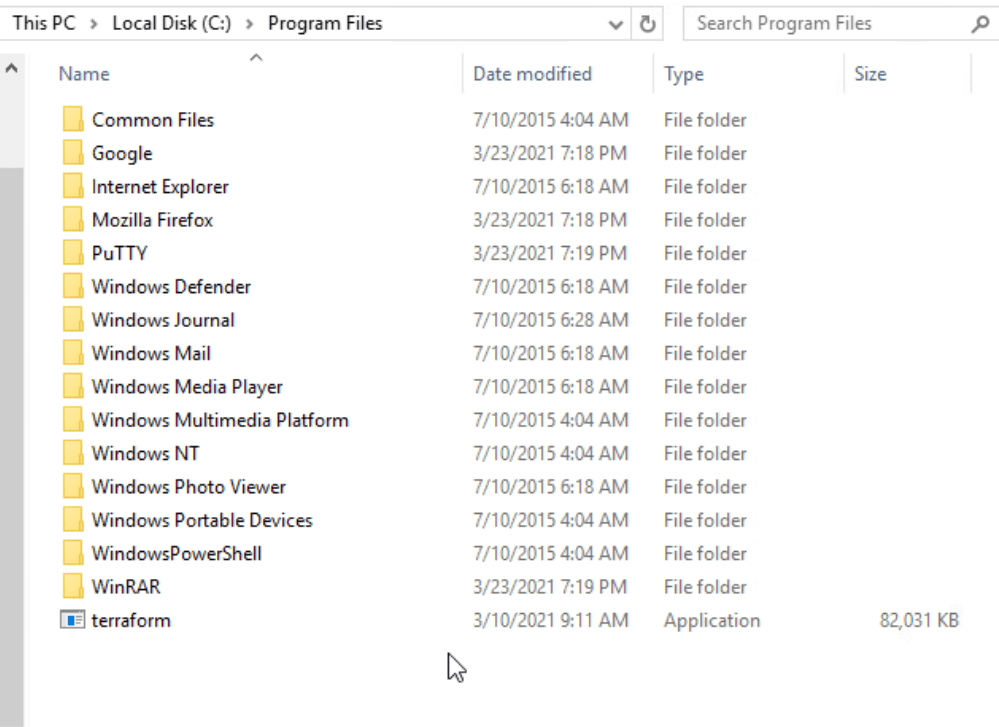
Navigate to the Terraform downloads page. Select the Windows 64-bit option and download the zip file. Extract terraform from the ZIP file. Move that file to C:\Program Files\
We now need to add that file to our system Path. To do this Open Control Panel -> click on System and Security -> Click on Advanced System Settings.
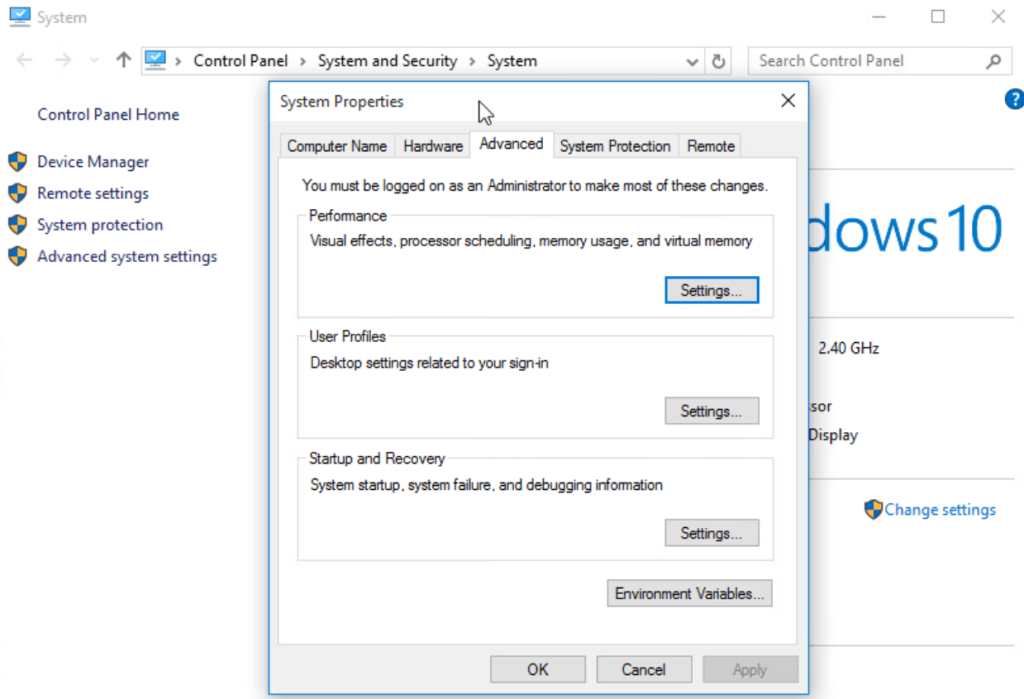
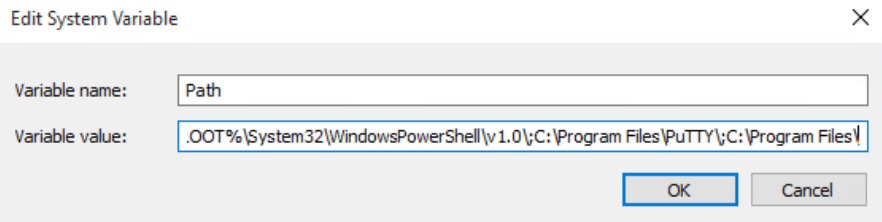
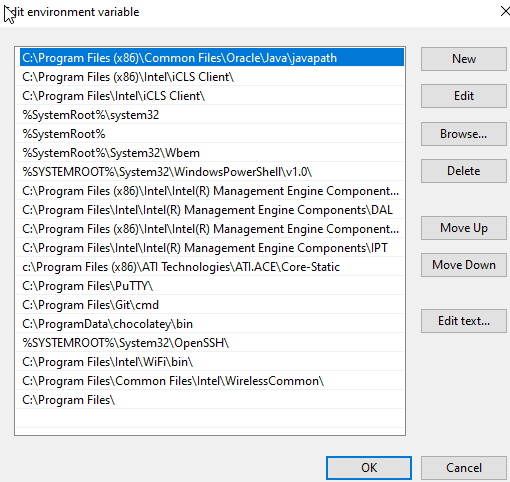
Select Environment Variables then under system variables select Path and press Edit. Each item in the list is separated by a semicolon (In older Windows 10 installations). In up-to-date Windows 10 installations there is a table of entries. Add C:\Program Files\ to that list.
OR
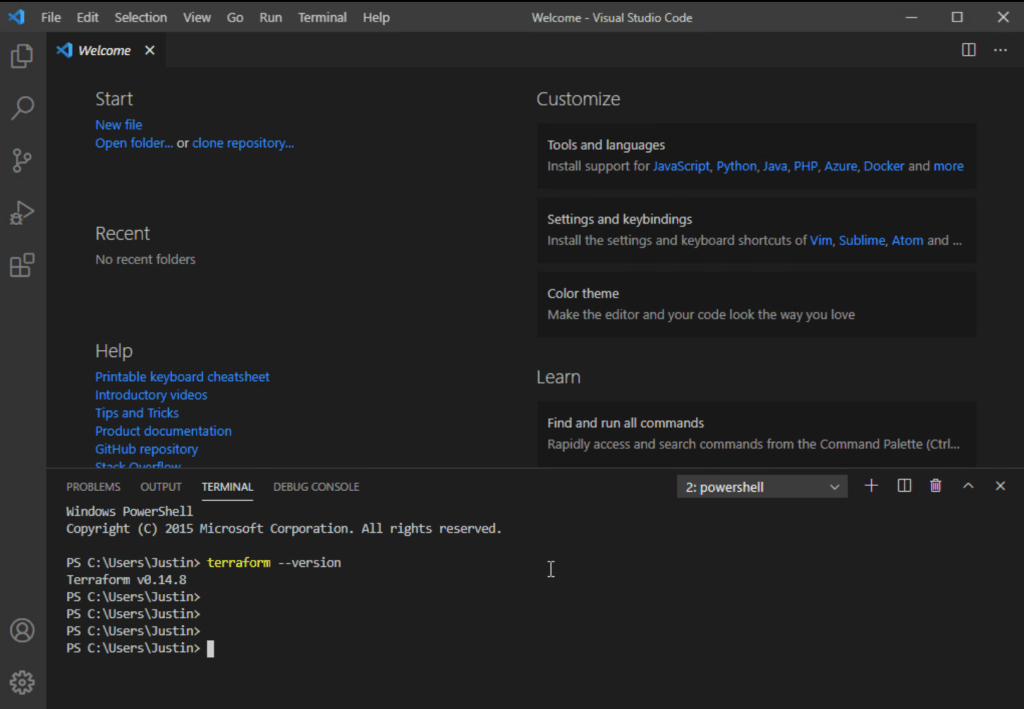
Open a CMD prompt or Powershell windows and type terraform --version

If this is your first time using VS Code press ctrl+shift+'. This will launch a terminal window at the bottom. From there you can also run Terraform commands.
Okay, now we have confirmed that our two tools are working together. Lets start our Terraform project. I have launched a fresh deployment of Cisco’s ACI Simulator. I have only configured the APIC through the CLI to get the deployment started. I have NOT login into the web interface and configured anything related to tenants, bridge domains, EPGs, or any system wide settings. I haven’t even adopted switches into the fabric yet. We will do all of this through Terraform!
Terraform has providers that are used to connect to and manage different types of resources. AWS, Azure, GCP all have their own providers which accommodate their features and API. Cisco ACI also has it’s own provider. A full list of providers can be found in the registry. Each of these providers documentation can be found in the registry.
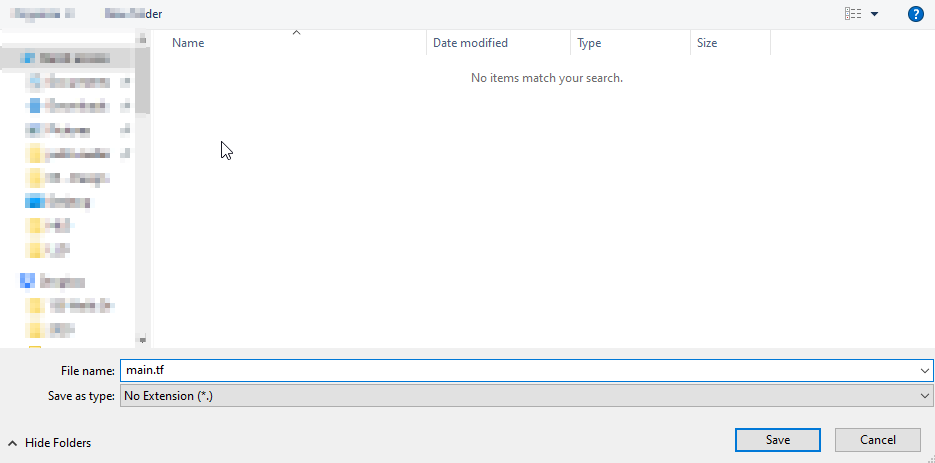
First, create a folder where you want to store your project. I’ve created aci-terraform. Now, create a new file in VS Code and save it into that folder. Name the file main.tf
Add the following code block to the top of your file and save the file.
terraform {
  required_providers {
    aci = {
      source = "CiscoDevNet/aci"
    }
  }
}

provider "aci" {
  username = "admin"
  password = "P@55word"
  url      = "https://172.31.16.90/"
  insecure = true
}
In your terminal, navigate to your working directory. cd aci-terraform
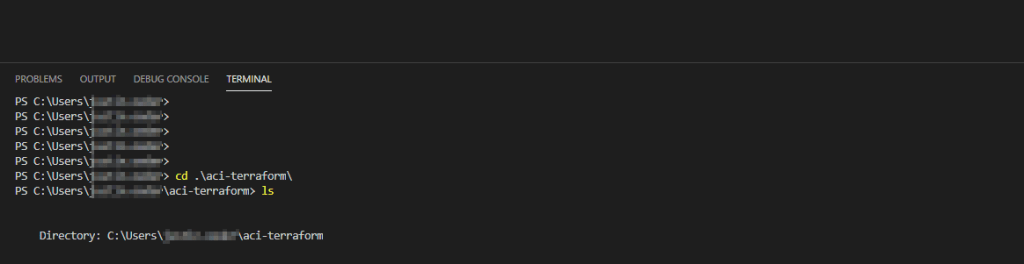
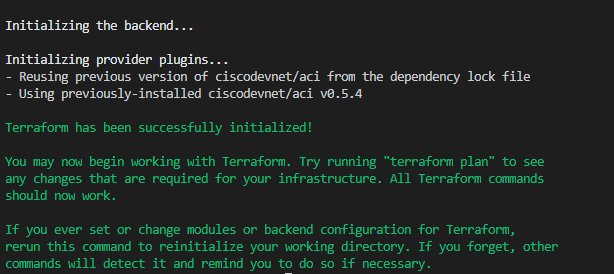
Run terraform init
Terraform Init will initialize your working directory by reading your main.tf file, downloading the needed providers, and create a few hidden files in the directory. .terraform and .terraform.lock.hcl Ignore these for now but do not edit or delete them. These files are how Terraform keeps track of current state.
We are now ready to start configuring ACI using Terraform. First thing we need to do is add our 2 leaf switches and 1 spine switch into the fabric. To do that we will use the ACI Fabric Node Resource and add each switch to our fabric. Looking at our fabric we can see that TEP-1-101 is pending registration.
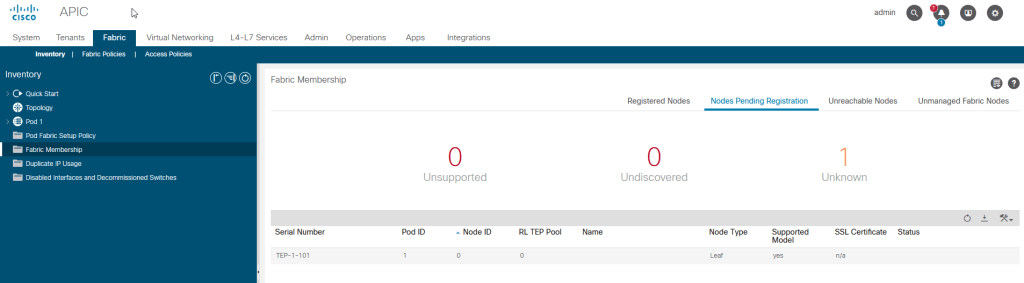
In order to do this via Terraform we need to capture the serial number. In the case of ACI Simulator the serial number is TEP-1-101. We add the following code to our main.tf file.
resource "aci_fabric_node_member" "LEAF-101" {
  name = "LEAF-101"
  serial  = "TEP-1-101"
  name_alias  = "LEAF-101"
  node_id  = "101"
  pod_id  = "1"
  role  = "leaf"
}- “aci_fabric_node_member” – This is the Terraform Provider Resource that should be used to configure the resource. “LEAF-101” is the Terraform unique name for this resource. This is the name that Terraform uses to track the resource.
- name – This is the “Node Name” in ACI
- serial number – This is the “Serial Number” in ACI
- node_id – This is the node ID number that the switch gets assigned in ACI
- pod_id – This is the ACI Pod ID to add this switch to. By default it is 1 unless you are running multipod.
- role – leaf or spine
Save the file.
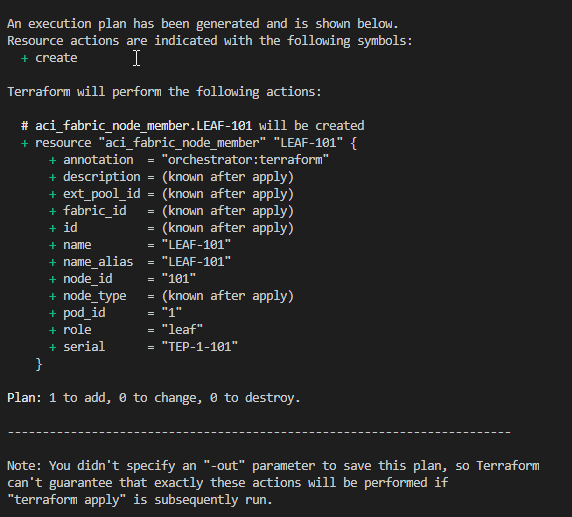
In your terminal, run terraform plan. This is a dry run of the Terraform file and will tell you what is being changed. Here we can see that we are adding or creating LEAF-101
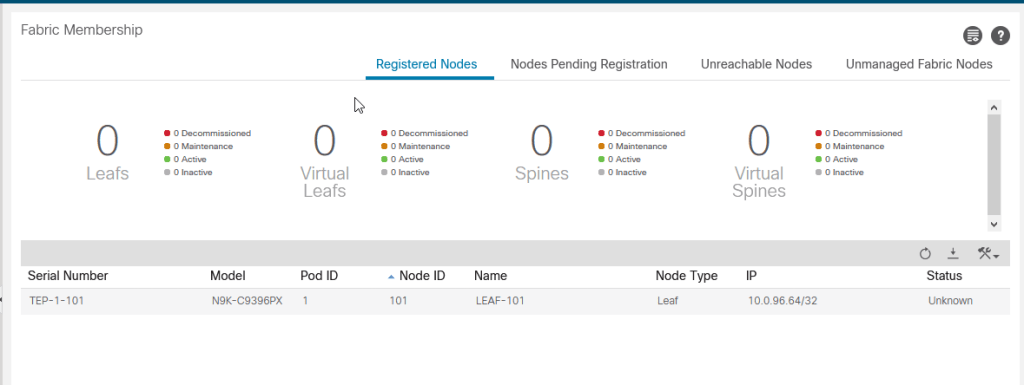
Now run terraform apply. You will be prompted if you want to make these changes. Type yes
Now navigate to ACI and look at your Registered Nodes. LEAF-101 has been added to your fabric!
. Now we repeat the process for the spine switch and the second leaf switch. The spine switch has a serial number of TEP-1-103 and the second leaf switch has a serial number of TEP-1-102. We can add both of these at the same time. The entire file should look like the following. Make sure to save the file!
terraform {
required_providers {
aci = {
source = "CiscoDevNet/aci"
}
}
}
provider "aci" {
username = "admin"
password = "P@55word"
url = "https://172.31.16.90/"
insecure = true
}
resource "aci_fabric_node_member" "LEAF-101" {
name = "LEAF-101"
serial = "TEP-1-101"
name_alias = "LEAF-101"
node_id = "101"
pod_id = "1"
role = "leaf"
}
resource "aci_fabric_node_member" "SPINE-901" {
name = "SPINE-901"
serial = "TEP-1-103"
name_alias = "SPINE-901"
node_id = "901"
pod_id = "1"
role = "spine"
}
resource "aci_fabric_node_member" "LEAF-102" {
name = "LEAF-102"
serial = "TEP-1-102"
name_alias = "LEAF-102"
node_id = "102"
pod_id = "1"
role = "leaf"
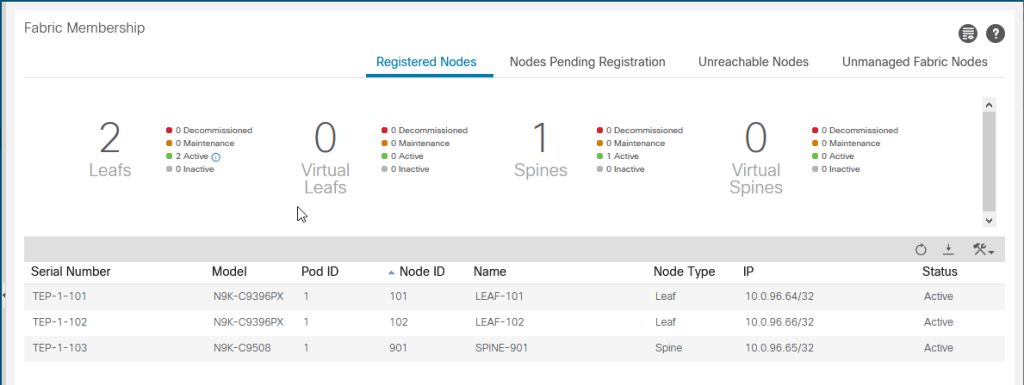
}Run terraform plan to get a snapshot of what is being configured. Run terraform apply to apply the configuration. Wait a couple minutes for ACI to register the nodes and then take a look. All three nodes are registered and active in ACI.
So we just configured a few resources in ACI using Terraform, big deal, what does that buy me? Well, not much right now but in another post we will look at the power of Terraform and its state enforcement. You will see that we can quickly rename resources, link to other resources and manage all the components of ACI and their interdependencies very easily. For example Interface Polices linked to Interface Policy Groups and and EPGs linked to bridge domains.
